DIY Roof Inspection: Identifying Potential Issues Before They Escalate


Understanding the Importance of Regular Roof Inspections
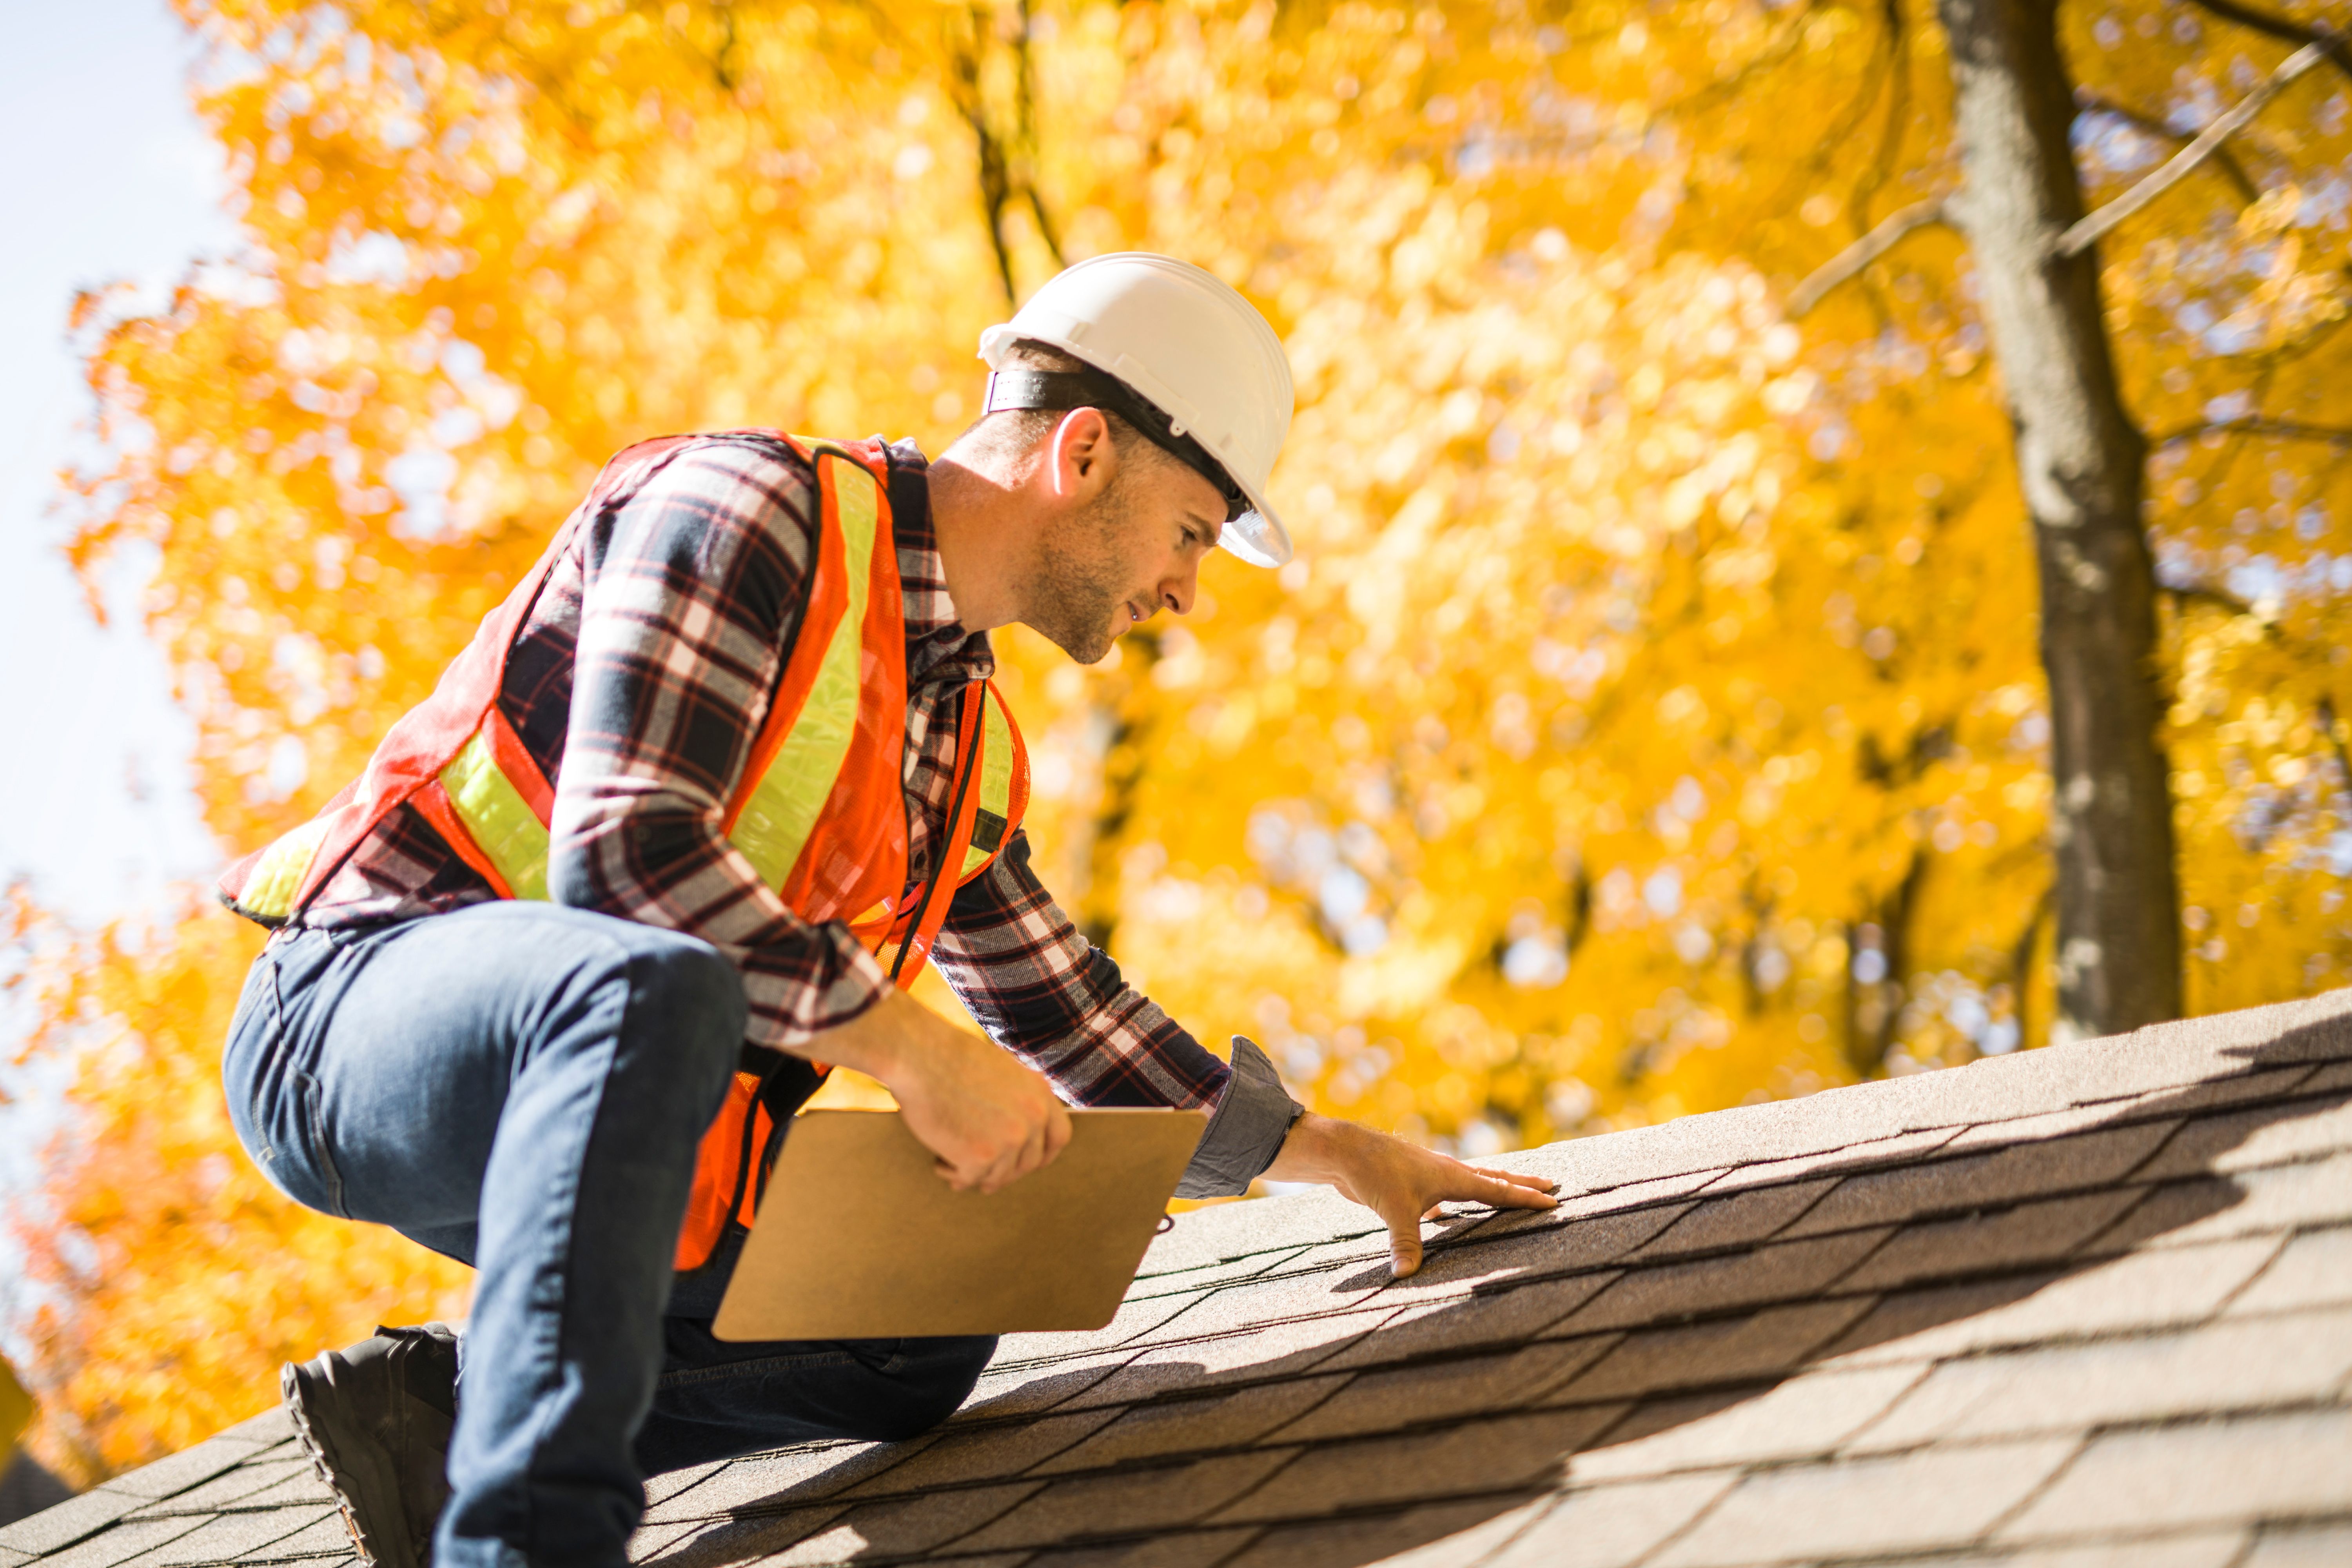
Maintaining the integrity of your roof is crucial for protecting your home from the elements. A roof inspection might seem daunting, but conducting a DIY inspection can help you identify potential issues before they become costly repairs. Regular inspections can extend the lifespan of your roof and ensure your home remains safe and dry.
By performing a thorough examination of your roof, you can spot signs of wear and tear early and take action before minor damages escalate into major problems. With a few tools and a bit of know-how, you can inspect your roof effectively.
Tools Needed for a DIY Roof Inspection
Before you begin your inspection, gather the necessary tools to ensure a comprehensive evaluation. Here’s a list of items you may need:
- Ladder
- Binoculars
- Flashlight
- Notebook and pen
- Camera or smartphone for photographs
Having the right tools will make the inspection process smoother and help you document any potential issues you find.
Inspecting Shingles and Roof Surface
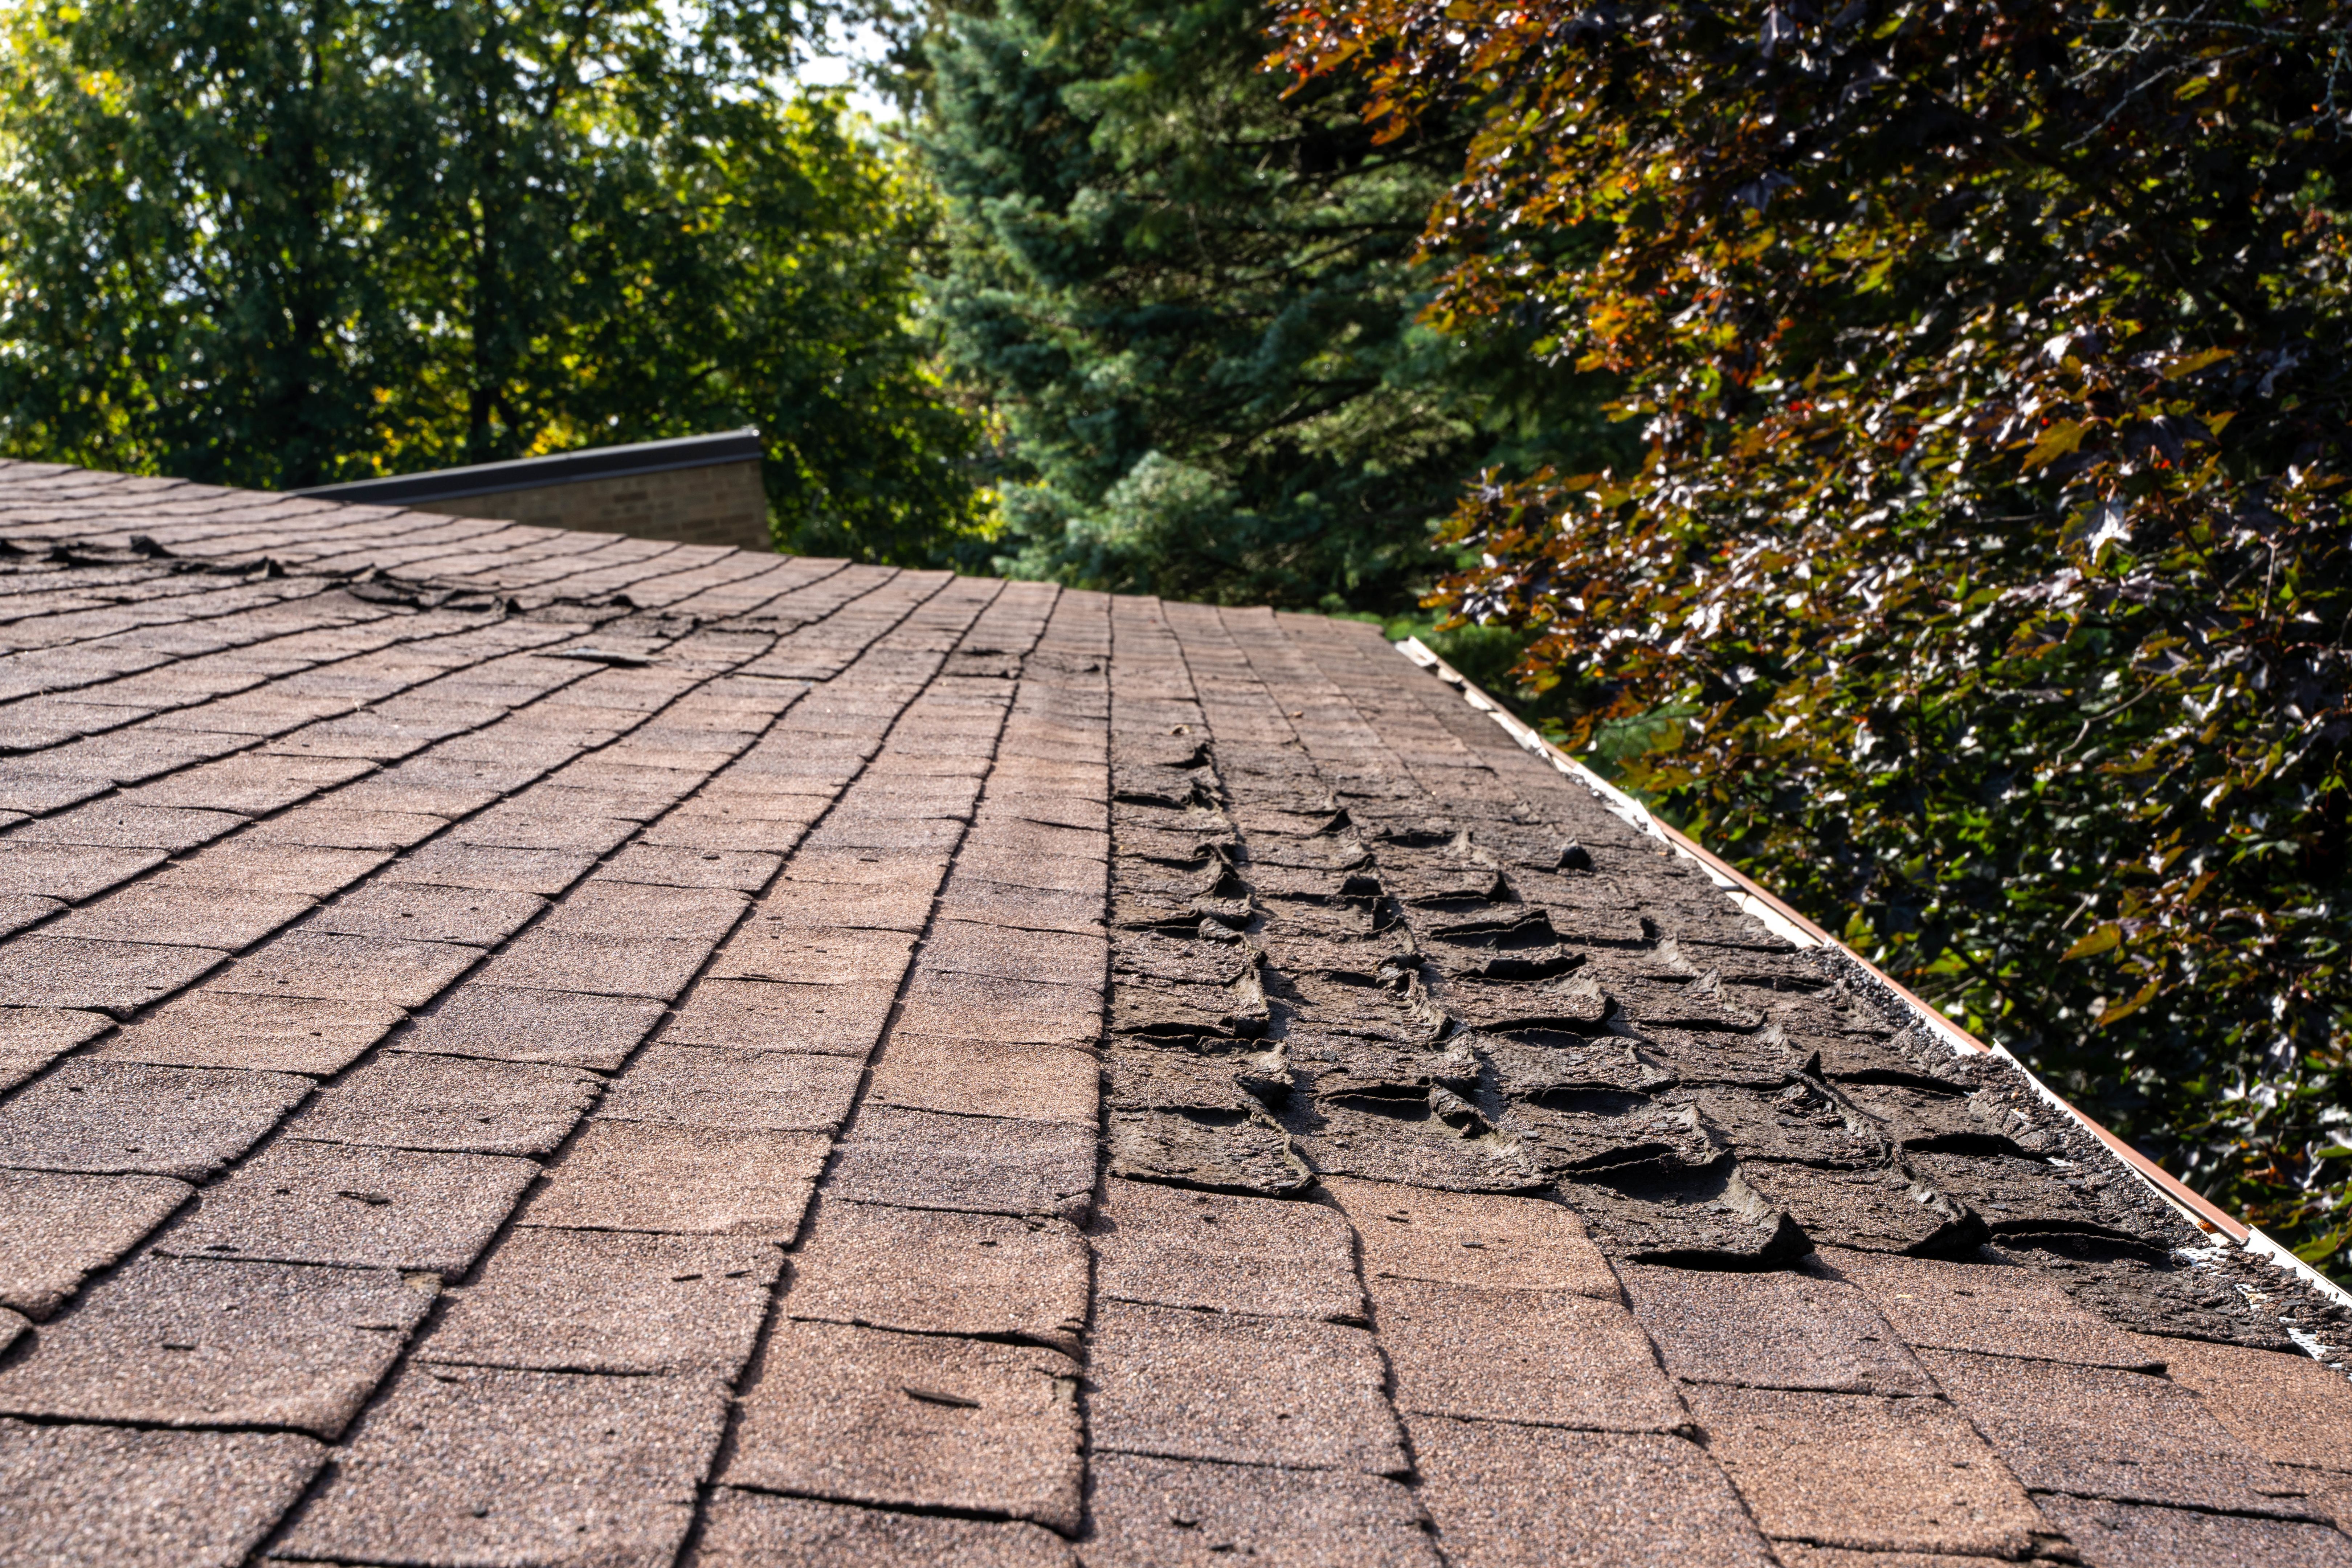
Start by examining the shingles for any signs of damage. Look for cracked, curling, or missing shingles, which can indicate that your roof is aging or has suffered storm damage. Pay particular attention to areas prone to leaks, such as around chimneys or skylights.
While inspecting, also check for granule loss on asphalt shingles. If you notice a significant amount of granules in your gutters or downspouts, it may be time to consider replacement.
Checking for Water Damage and Leaks
Water damage is one of the most common issues homeowners face. Inside your attic, use a flashlight to look for signs of leaks such as water stains, mold, or mildew. These signs indicate moisture intrusion and should be addressed promptly to prevent further damage.
If water damage is present, trace back to the source. Often, it could be due to damaged flashing or improperly sealed roof penetrations. Make notes and consider consulting a professional if the issue seems extensive.
Examining Gutters and Downspouts
Your gutters and downspouts play a crucial role in directing water away from your roof and foundation. During your inspection, clear any debris that may have accumulated, such as leaves or twigs. Blockages can lead to water pooling on your roof, causing damage over time.
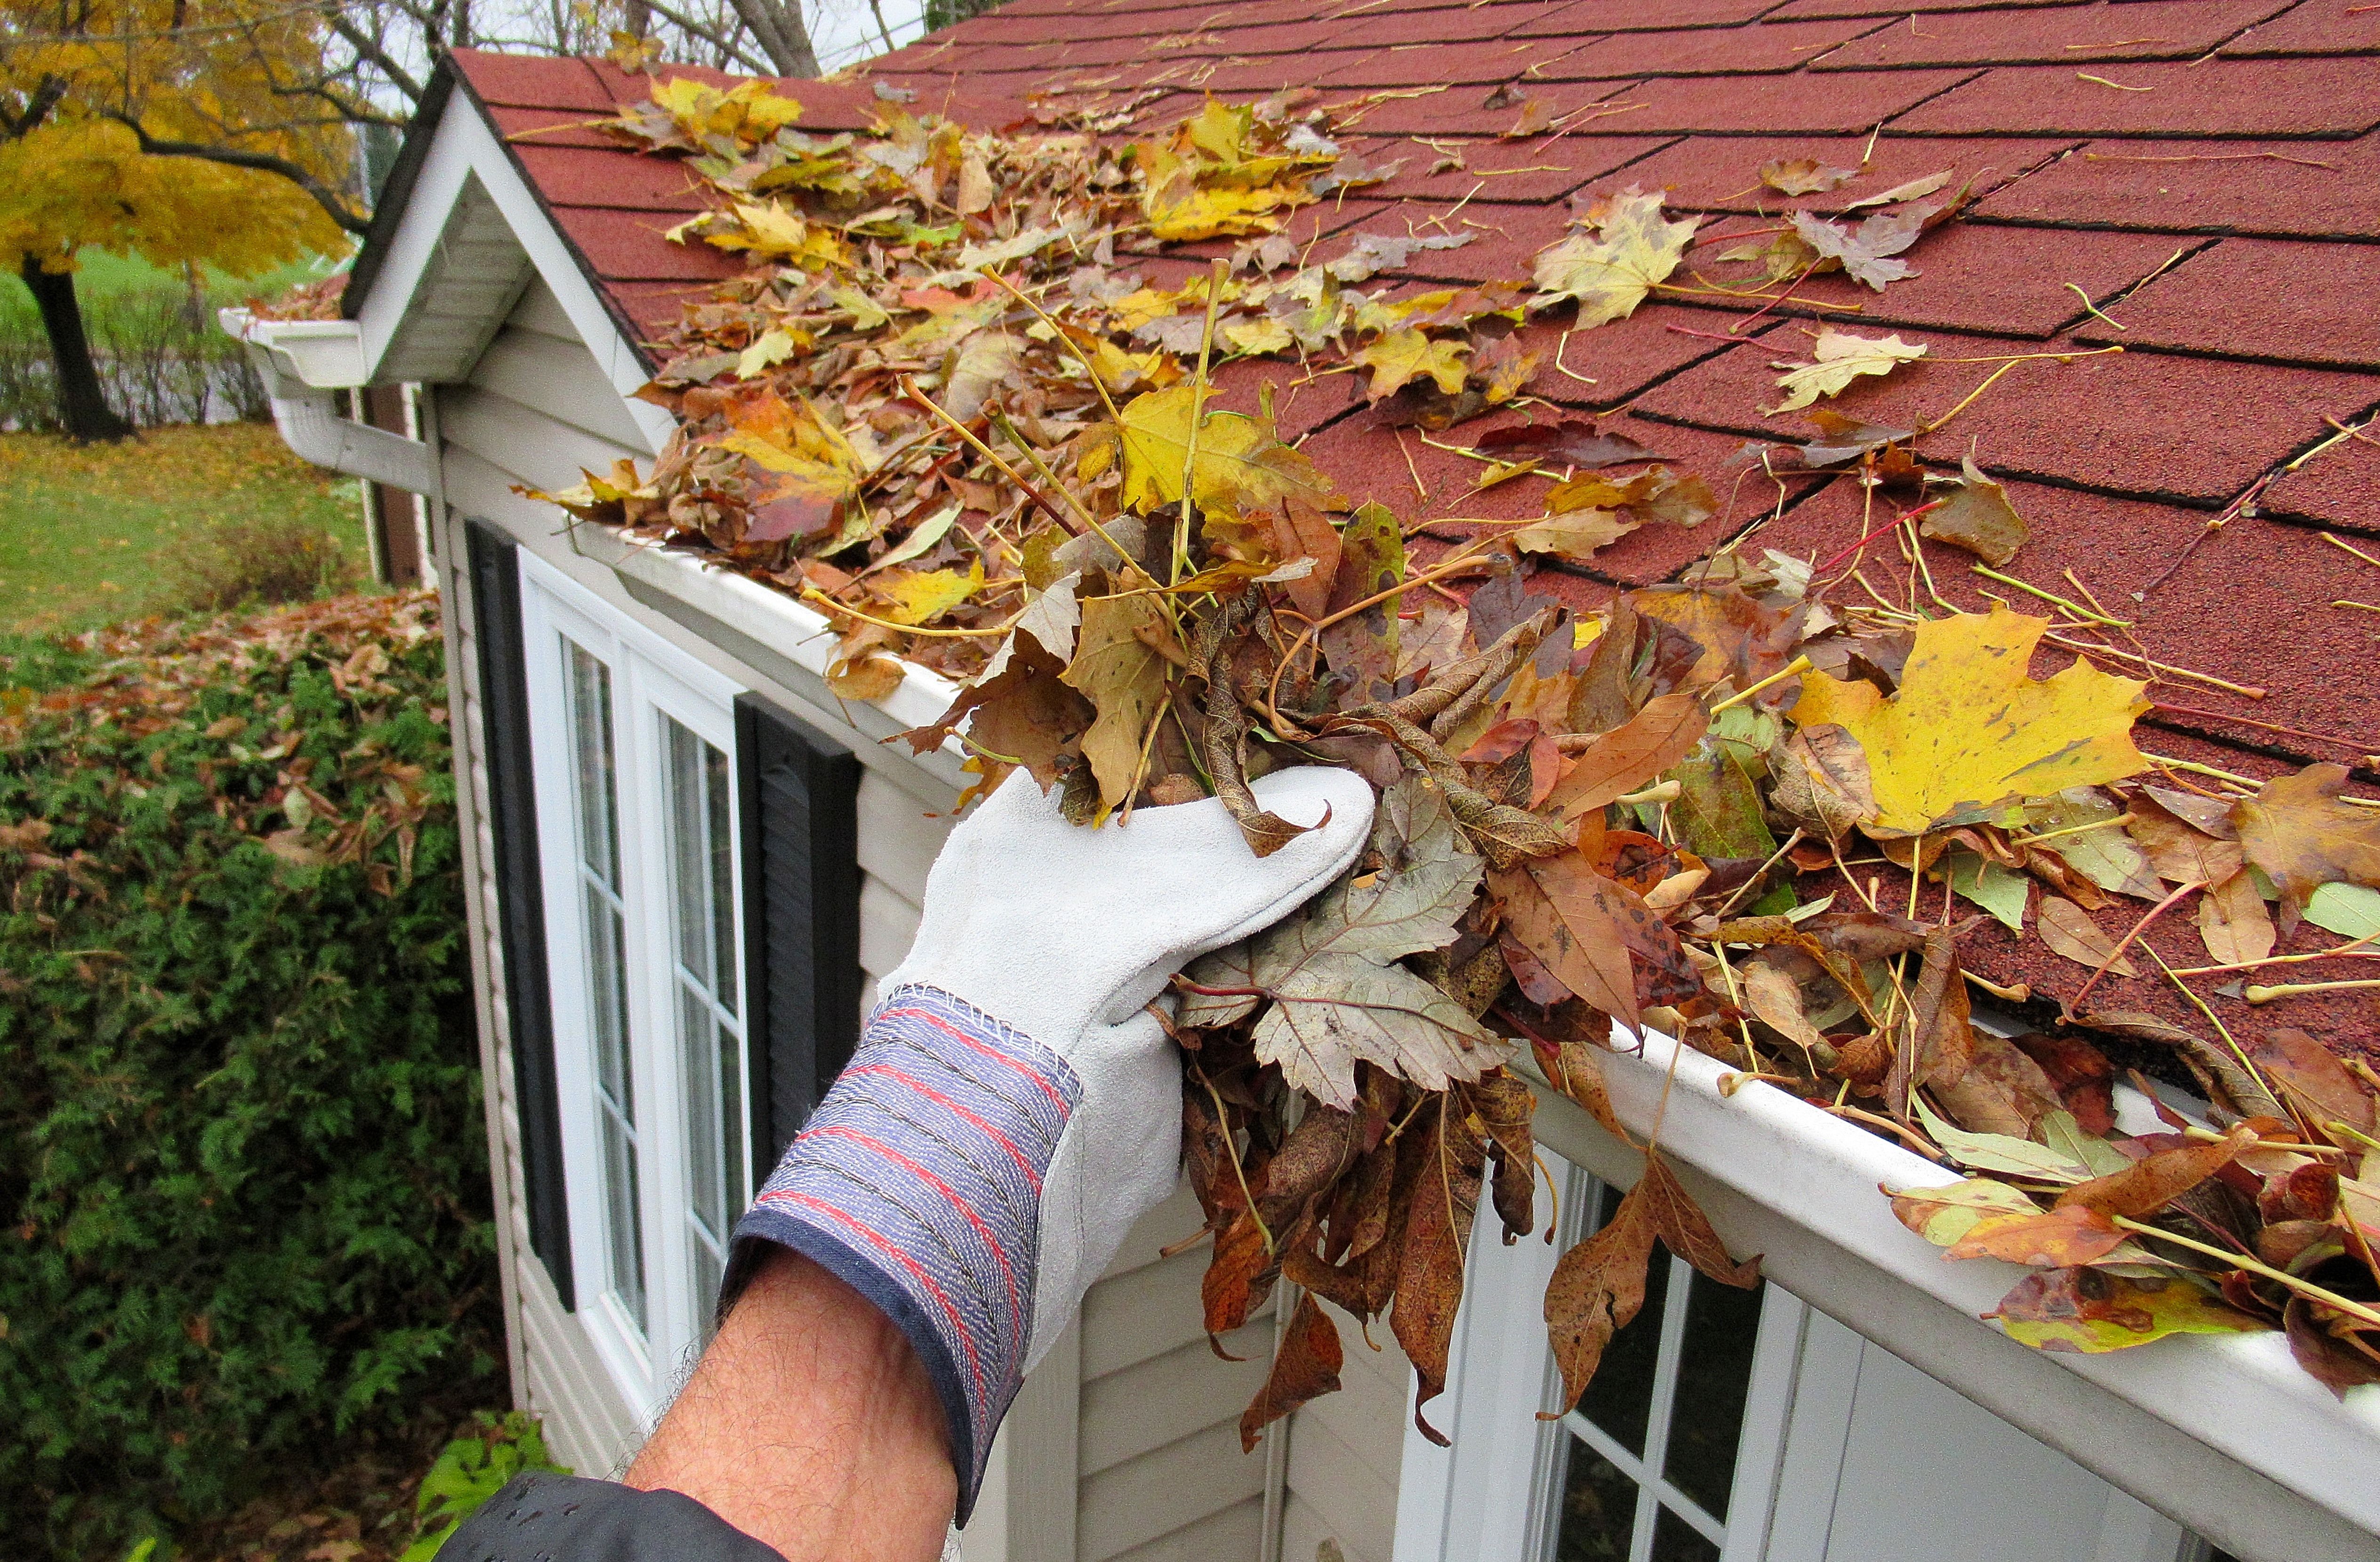
Also, check the gutters for any signs of rust or sagging. These issues can impede proper water flow and should be repaired to maintain effective drainage.
Identifying Potential Structural Issues
A roof's structure is fundamental to its overall health. Look for any sagging areas or uneven surfaces that may indicate structural concerns. These issues could be due to water damage, poor installation, or natural settling over time.
If you notice significant structural problems, it’s advisable to contact a roofing professional. An expert assessment can prevent further deterioration and ensure your roof remains secure.
Taking Action After Your Inspection
After completing your DIY roof inspection, review your notes and photographs to determine the next steps. For minor issues, such as replacing missing shingles or clearing gutters, consider handling these tasks yourself if you feel comfortable.
For more serious problems, enlist the help of a qualified roofing contractor. Timely repairs can prevent small issues from escalating into costly repairs, ultimately protecting your home and investment.